British Pounds


How To Pond Guides
Check out our pond guides to answer all your design, installation, maintenance and pond health questions
Consider all the key factors affecting the style and pond position. If you need any help, consulted one of our in-store experts about equipment and any additional advice required.
Drawing out a scaled plan of your garden on some graph paper, include paths, trees, shrubs and any other permanent features with some basic contour lines showing slopes etc.
Then, on some tracing paper overlaid on your plan, you can try various ideas and easily see which will be best suited. Try different shapes and positions around the garden, remembering to consider viewpoints, sunlight levels, overhanging trees and other factors.
Once happy with your sketches, it is worth marking out the proposed pool in the garden using a rope or hose. Then walk around your garden and check the overall impact from all desired viewpoints.
When you are satisfied with the general shape and location of the planned pond, it can prove helpful to draw a more detailed plan of the actual pond, including pond depth, planting areas, edging methods, filtration siting and routes for electric cables and hoses.
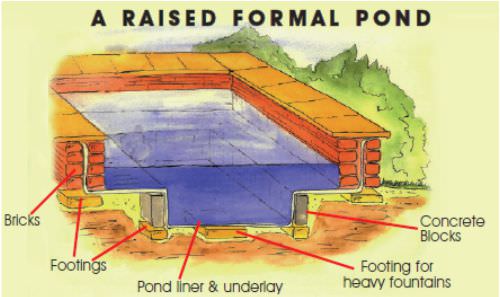
Raised ponds can be either completely above ground or only partially raised. Partially raised ponds are more suitable for fish as they keep the temperature of the water more stable, particularly during the winter months.
Raised ponds often look particularly effective in formal gardens and have the added benefit of reducing the amount of excavation required and the quantity of soil needing to be removed from the site. Another important benefit is the safety factor provided by a raised pond when considering children and wheelchair users, as well as making the pool more accessible and workable for all.
Additional areas of consideration when planning a raised pond include adequate strength of construction of the walls and concealing a suitable filtration system. This is easier if the pond is only raised on three sides and soil is banked behind on the other, allowing scope for a waterfall flowing from the outlet of the filter.
Alternatively, consider a pressurised filter, which can be hidden in a chamber next to the pond or an “in pool” filter, which are available for smaller ponds.

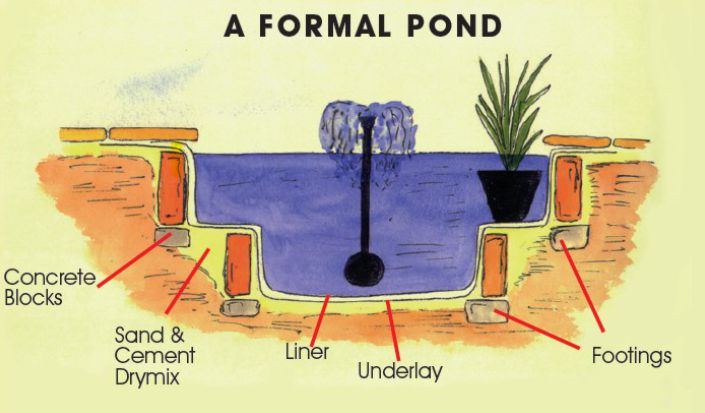
Formal ponds, either raised or at ground level, are ideal on patios or lawn areas. Careful consideration should be taken in the design stages when choosing your edging method. When edging with slabs, it is advisable to position the slabs before excavation to create your pool template. This will also limit the number of slabs which require cutting. Crazy paving can provide an easy but attractive alternative especially on pools with curved edges. It is also possible to purchase a “round circle” of slabs from paving suppliers, which could create a perfect edge for a round pond.
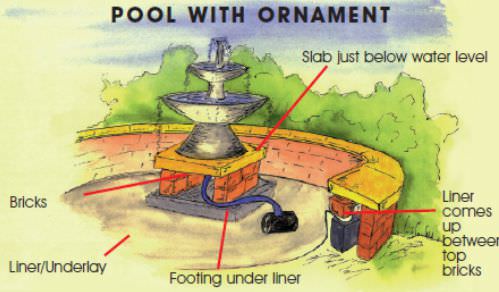
Should you desire a heavy stone fountain in the pool, which looks effective in many formal situations, it may be necessary to form a concrete footing in the base of the excavation to support the weight of the fountain and its base before installing the liner.


When constructing an informal pond your imagination, budget and garden space are the only real limiting factors whilst adhering to the basic rules of pond design already covered.
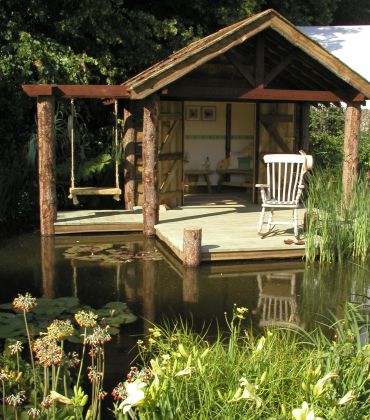
Informal pools give limitless scope to incorporate many different design features and textures into your water garden. Many different man-made and natural materials can be used in the construction of your feature including decking, stone, walling, cobbles and sleepers etc.
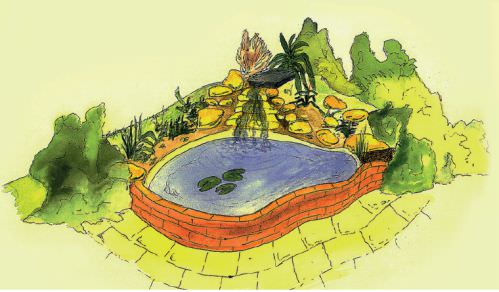
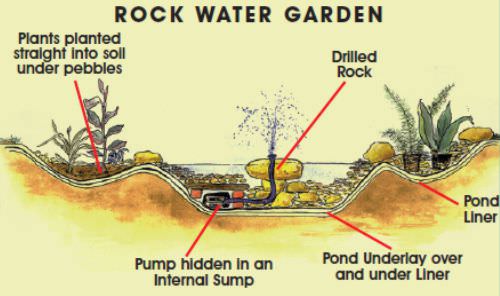
The use of pebbles and gravel in gardens is very popular and this is no exception when it comes to water gardens, with the glistening wet stones adding another dimension to your creation. The picture below shows the result of using gravel and pebbles combined with planting and a beautiful feature, with water bubbling gently from it.
Plants can be placed in suitable pots straight into the gravel, or soil pockets can be hidden under the gravel so that the plants are not restricted in growth. The pump and hoses can be hidden under stones. Remember, the pump should be housed in an accessible reservoir chamber as illustrated.
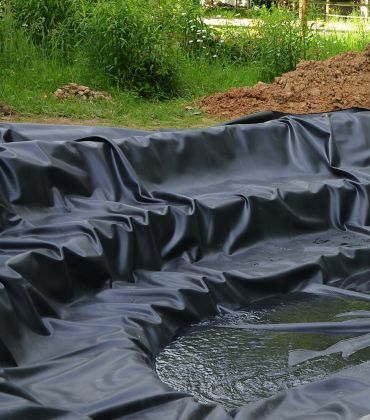
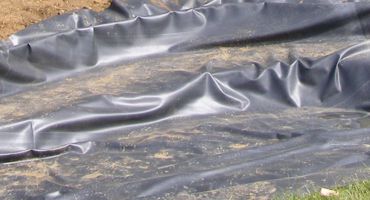
Important: - A heavy-duty liner should always be used for all pebble and gravel pools.
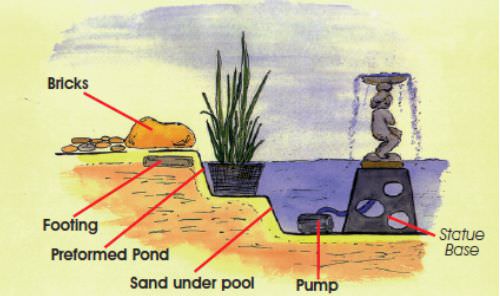
This is a simple illustration of how you could position a fountain in a pool. It must be remembered that heavy fountains may need additional support under the liner, this can be created by installing a footing under the liner when first building the pond or if already constructed use a large slab to distributed the weight (it is best to use some old liner or underlay between the slab and pond liner)
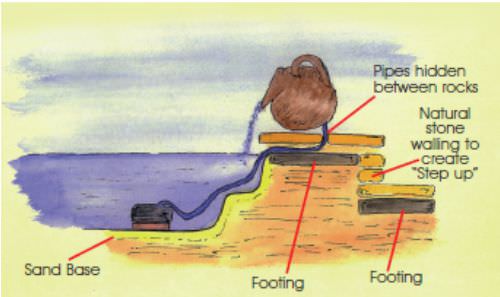
Although it is possible to join pond liners with various tapes and adhesives, we would not suggest an underwater join unless done professionally, or you use one continuous pond liner sheet if practical.
The safest method is to have the ponds at different levels then generously overlap the pond liners on a connecting waterfall or stream. Joining tape can be additionally used as required.
These profile view illustrations shows waterfalls connecting two ponds. It is also vital to ensure the liners are sufficiently higher than the water level on each side of the waterfall.

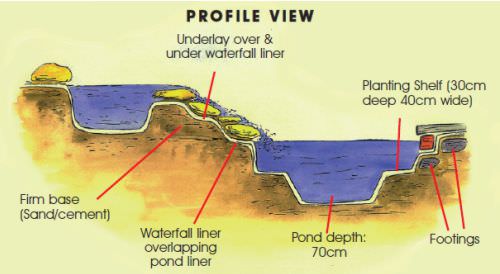
Vital Tip: Algae and debris will build up on the waterfall, causing the water depth on the higher pond to increase over time.
Regularly clearing and algae removal will help, but it can quickly build up depending on the season. Ensure the sides of the waterfall and higher ponds edging allows for a gradual water level increase.
Check out our pond guides to answer all your design, installation, maintenance and pond health questions